Some old-fashioned techniques can be updated with methods that save you time and money.
Repair is one of those grey areas in our business. Seemingly rooted in alchemy and artisan’s guilds, it involves such techniques as burning in, and French polishing, and rubbing with rottenstone… it certainly does seem like an ancient craft! But it isn’t. In fact, it’s a whole lot simpler than those who repair furniture would care to admit.
Now, don’t get me wrong, I’ve been in repair for many years and I am still challenged in my shop on a daily basis. There are so many things that can go awry for a refinisher, but from my experience, most of these catastrophes have come from working with antiques and older modern furniture. Things like silicone in some furniture polishes can wreak havoc on a new coat of lacquer, especially if it’s had time to seep through microscopic cracks in the finish down into the wood itself. That’s no fun.
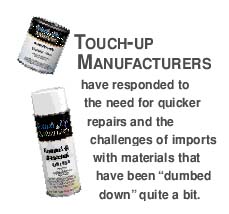
So what about new furniture, right out of the box? Truthfully, touch-up manufacturers have responded to the need for quicker repairs with materials that have been “dumbed down” quite a bit. This is crucial, because imports, for example, present new and different problems; some having to do with more complex finishes and handpainting.
Some old-fashioned techniques common in our industry have been replaced by the following methods that can save your repair/ deluxing departments time and money.
Flyspecking
The old way involves using glaze, or stain, or a mixture of lacquer and pigments. The ratio has to be perfect—not too dark or too light—and in some cases the flyspecks have to be applied without topcoating the surface. The stain is then carefully applied to a coarse paint brush—not too much, which will come off too bold, and not too dry, which won’t show up at all—and “flicked” onto the surface by flicking ones fingers across the tips of the bristles, sending the stain onto the surface as little droplets. Delivery depends on the brush’s load and the accuracy of the craftsman. The new way involves picking the right color flyspecking or spatter (both available in aerosol form), holding it back from the surface one or two feet, and “spritzing” the surface by making short bursts from the can. TIME SAVED: How long does it take to pick up a can?
Staining
Staining the old way involves using NGRs, wiping stains, or in some cases custom-mixed stains using dyes, pigments, solvents and possibly binders. The colors are carefully mixed. Sometimes more stain than necessary needs to be made just in case the batch becomes too light, or too dark, and must be amended by adding more material. Since the solvents (or vehicle) must evaporate fully before topcoating, a delay of several hours, or even a full day may be required to let the vehicle flash off. The new way to stain involves spraying the NGR or wiping stain from a can, wiping off the excess, and flashing off what little vehicle remains by blowing hot air from a hair dryer over the surface for a few minutes. TIME SAVED: Bunches.
Antiquing wax
You may be thinking… “what is antiquing wax anyway?” It’s the grey stuff that you see hung up in details and mouldings on a lot of imported pieces. Since this is a relatively new addition to the world of furniture finishing, there is no old way to apply antiquing wax, but there are plenty of wrong ways. One involves mixing a glaze and applying it heavily to the piece, then wiping off the excess. The problem is that glaze doesn’t have much of a binder—that is, there’s nothing really holding it to the surface. If binder is added, then wiping off the excess becomes harder, because the solvents in the binder can bite the surface, causing a hazy look. When this occurs the piece must then be topcoated. If you look closely you’ll see that more often than not, the antiquing wax doesn’t have a finish over it; it’s just “hung up” in the cracks. Applying a clear finish over the glaze makes it look uniform and perfect, which is the exact opposite of what an antiquing step is supposed to look like. The new way involves using something called “dusty wax” which now comes in four colors. Spray it on, and wipe off the excess. No need to topcoat. TIME SAVED: A lot.
Damages & Defects
Furniture is made with more mechanical fasteners than ever before, as manufacturers struggle to deliver cheaper prices in the face of higher demand worldwide. As quantity goes up, quality usually goes down. When a new piece of furniture is mishandled, it is more likely to suffer damage than its older, handmade counterparts. So with all these new problems, what’s a furniture business owner to do? Adapt. Business owners who want to improve shop operations must start their analysis by looking at the operation as a whole. After all, what is driving your repair shop? Damages and defects are its reason for being. Where do most of your damages come from? Most probably the culprit is internal handling. One good way to find out if you’re either ahead of the curve—or behind the times—is to perform an in-depth analysis. If you don’t have the expertise or the time to do this in-house, an on-site visit by a consultant lasting from a few days to a week can be an attractive alternative. Before you can solve problems, operational weaknesses must be exposed. Only then can these problems be resolved to relieve the greater damage to your bottom line via your repair shop and clearance center.
Look at your operation as a whole, dissect it into parts and examine how each part integrates with the whole. For example, you may have a stellar shop that is overloaded with damaged furniture because of the way your people handle stock. Another possibility is that your staff may have excellent deluxing capabilities, but because drivers have never been trained to make in home repairs, fresh damages discovered on delivery result in operational inefficiencies that sabotage your bottom line. A qualified consultant takes all of these conditions into consideration before suggesting changes to your repair operation.
We’ve all heard about cross-training but few furniture retailers actually do it, because — it’s hard to figure out how to make time when there’s so little of it in a day. However, cross-training is one of the best ways to ensure a successful first-time delivery. For example, your drivers may have wonderful delivery and communication skills, but if they don’t know how to touch up minor damages, your options are limited to: repair and redelivery; an in-home service call; or replacement. That is, if the customer agrees. Avoiding these high cost alternative solutions requires that your drivers have access to excellent tools and professionally administered training.
It’s not enough to grab a bunch of materials that are commonly used in the repair shop and tell your delivery staff to use them on the truck. After all, the shop is (usually) a climate-controlled, well-lit, low-dust environment. A truck is hot or cold, dark and dirty. Drivers have just a few minutes to complete a repair. All to often they must perform these repairs with a concerned customer impatiently peering over their shoulders.
It is, therefore, imperative that the materials issued to the drivers be:
•Easy to use. A driver’s kit should include basics, like naphtha and markers. The colors should be carefully chosen to accommodate the largest number of finishes possible, and amended whenever a new finish is added (especially colored finishes like barn red or hunter green).
•Fast to dry. Some lacquers have retarders added, which slow drying times. Some markers have binders that dry slowly as well, allowing them to smear, especially if a sweaty hand rubs across a freshly touched-up edge. Choose carefully according to the conditions under which materials will be used and adapt as necessary.
•Goof-proof. A driver’s main qualifications do not usually include color matching. Therefore, provide materials that can be easily removed with common solvents if necessary. A manual showing what to do in case of a mistake is helpful and can be included in the kit.
Remember, the last (and sometimes the first) person a customer sees when buying furniture is the driver: Make his presence, appearance and abilities count.
As I’m sitting here writing this article and petting my beagle, Angel, I’m reminded of the old adage, You can’t teach an old dog new tricks. True. But people aren’t dogs, and I am not a big admirer of the inflexibility of some repairmen. A few years back, a tried-and-true touch-up manufacturer (Company A) was absorbed by a larger competitor (Company B). The shop that I was managing in the mid-1990s was a steadfast user of Company A’s products. But one fateful day, Company A’s product line disappeared. Did my shop close its doors? No, we began using Company B’s products. Life went on. Sometimes, change is necessary; when it saves time, or money, or both, it becomes illogical to hold onto old methodology simply because the learning curve, usually a minor one, hurts just a bit. In the repair shop, it is important to provide materials that will simultaneously speed up a repair, but keep its quality the same as the old-fashioned techniques (which aren’t, by the way, always better) and save you some money as well. Some examples include:
Basecoats. Stocking a wide palette of basecoats (which are heavily pigmented toners used to block out defects and repairs) allows the repairman to very quickly disguise repair work. For example, carvings that have been crushed and rebuilt can be blocked out with a basecoat, then faux-grained using glaze to simulate a perfect carving.
High-Solids Lacquer. A gallon of lacquer is usually 90% solvent and 10% solids. When you lacquer, the only thing remaining on the wood is the solids. The type of lacquer delivery system you use directly affects the economy you realize from your lacquer. For example, a cup gun is a simple and inexpensive method, but it is also the most wasteful, putting as little as 20% of the gun’s spray onto the wood itself. So consider this—if you spray ten ounces of lacquer with a cup gun, only two ounces wind up on the wood; and of those two ounces, only one tenth of that remains on the wood as solids. The rest goes blowing up the stack. In contrast, HVLP is anywhere from 65% to 90% efficient. A good consultant can help show you much more efficient methods of delivery, and suggest suppliers of higher-solids lacquer.
Simplify Your Techniques
When it comes to minor dents, there is no faster way to repair them than a burn-in. Done right, they can eliminate dents in seconds. Some shops insist on digging out the dent, filling with a putty or epoxy, sanding it flush, touching up the color, and relacquering the surface. Do you have that kind of time? There are other, better ways to speed through repairs without compromising quality.
It may be a good time to take a close look at the procedures and tools your repair people use every day. An experienced member of your staff or an outside consultant will likely be able to identify areas where waste, mishandling, ignorance and inefficiency negatively impact your bottom line. Your repair people are similar to your sales team in that each needs essential training, appropriate materials, and streamlined systems. Investing time and resources in your shop operation can have far-reaching benefits for many years to come.